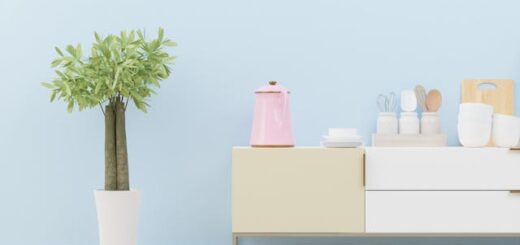
Top 10 DIY Home Decor Projects You Can Tackle in a Weekend
Home decor is a powerful way to express your personality and style, but achieving a stunning living space doesn’t always require hiring a designer or spending a lot of money. DIY home decor projects are a fantastic way to make a space uniquely yours, and the best part is that you can often complete them over a weekend! Whether you’re looking to update your living room, refresh your bedroom, or add some flair to your kitchen, there’s a DIY project for every style and budget. In this article, we’ll guide you through the top 10 DIY home decor projects you can tackle in a weekend.
Table of Contents
1. Create a Statement Wall with Peel-and-Stick Wallpaper

Why Choose Peel-and-Stick Wallpaper?
Peel-and-stick wallpaper is one of the easiest ways to create a bold, stylish statement wall in your home. It’s perfect for renters or anyone looking for a non-permanent solution. With a wide variety of designs and textures to choose from, including botanical patterns, geometric shapes, and textured materials, peel-and-stick wallpaper can transform a space instantly.
How to Apply Peel-and-Stick Wallpaper
Materials Needed:
- Peel-and-stick wallpaper
- Measuring tape
- Level
- Utility knife
- Squeegee or smoothing tool
Steps:
- Prepare the Wall: Clean the wall thoroughly to remove any dust or debris.
- Measure and Cut: Measure the wall and cut the wallpaper to the desired length, ensuring you leave a few extra inches at the top and bottom.
- Peel and Stick: Begin applying the wallpaper from one corner of the wall. Peel off the backing paper slowly and press the wallpaper onto the wall as you go. Use a squeegee to smooth out any air bubbles.
- Trim Edges: Once the wallpaper is applied, use a utility knife to trim any excess around the edges of the wall.
- Admire Your Work: Step back and enjoy your fresh new statement wall!
2. Upcycle Old Furniture with a Fresh Coat of Paint

Why Repainting Furniture is a Great Weekend Project
Repainting old furniture is a simple and cost-effective way to breathe new life into your space. Whether it’s a dresser, coffee table, or bookshelf, a fresh coat of paint can completely change the look of the piece. Plus, it’s a fun and satisfying project that doesn’t require advanced skills.
Steps to Repaint Furniture
Materials Needed:
- Sandpaper (medium and fine-grit)
- Primer
- Paint (latex or chalk paint)
- Paintbrush or roller
- Drop cloth or newspaper
- Painter’s tape (optional)
Steps:
- Prep the Furniture: Start by sanding the surface of the furniture to remove any old finish and create a smooth surface. Wipe off the dust with a clean cloth.
- Prime the Surface: Apply a coat of primer to ensure better paint adhesion, especially for surfaces that may have been previously painted or varnished.
- Paint the Furniture: Once the primer is dry, apply the first coat of paint. Allow it to dry, and then apply a second coat if necessary. Use a brush for edges and a roller for flat surfaces.
- Let It Dry and Reassemble: After the paint is fully dry, reassemble the furniture if it was taken apart. You can also add new hardware like knobs or handles to further personalize the piece.
3. Create a Macramé Wall Hanging

The Beauty of Macramé
Macramé wall hangings are a beautiful and trending way to add texture and boho flair to your walls. They’re versatile, customizable, and perfect for adding warmth and personality to any room. The best part is that you can create one in just a weekend!
How to Make a Macramé Wall Hanging
Materials Needed:
- Macramé cord or rope
- Wooden dowel or branch
- Scissors
- Measuring tape
Steps:
- Prepare Your Cords: Cut your macramé cord into several long pieces. The length depends on how big you want your wall hanging to be.
- Attach Cords to Dowel: Fold each cord in half and attach them to the wooden dowel using a lark’s head knot. Space them evenly.
- Begin Knotting: There are a variety of macramé knots you can use, such as square knots, spiral knots, and half knots. Choose your pattern and begin knotting the cords to create a beautiful design.
- Trim and Hang: Once you’ve completed your wall hanging, trim the ends of the cords to your desired length. Hang it on the wall and enjoy!
4. Install Floating Shelves

Why Floating Shelves?
Floating shelves are an excellent way to display your favorite decor items while saving floor space. They provide both style and functionality, making them perfect for small apartments or rooms with limited storage. Plus, you can install them yourself over the weekend.
How to Install Floating Shelves
Materials Needed:
- Floating shelf brackets
- Shelving boards (pre-cut or custom)
- Screws and wall anchors
- Drill
- Level
- Measuring tape
Steps:
- Choose Your Location: Decide where you want to install the shelves. Use a level to mark straight lines for even placement.
- Install Brackets: Drill holes into the wall and insert wall anchors if necessary. Attach the floating shelf brackets to the wall.
- Place the Shelves: Slide the shelves onto the brackets. Make sure they are level and secure.
- Style Your Shelves: Once your shelves are installed, arrange books, plants, or decorative objects to complete the look.
5. DIY Plant Wall for a Green Touch

Why Create a Plant Wall?
A plant wall is a creative and striking way to bring nature into your home. It can make a bold statement while also improving air quality and adding a sense of tranquility. Whether you choose small potted plants, hanging planters, or a vertical garden system, a plant wall can transform a room into a lush oasis.
How to Make a DIY Plant Wall
Materials Needed:
- Plant wall kit or wooden pallets
- Planters or pots
- Potting soil
- Plants (succulents, ferns, ivy, etc.)
- Drill and screws (for mounting)
Steps:
- Choose Your Wall and Plants: Pick a wall that gets enough natural light for your plants. Select plants that are suitable for indoor conditions.
- Mount the Planters: If you’re using a kit, follow the instructions to hang it on the wall. Alternatively, you can repurpose wooden pallets or create a grid of hooks for hanging pots.
- Plant and Arrange: Fill your planters with soil and arrange your plants in them. Hang the planters or place them in the mounted sections.
- Water and Enjoy: Water the plants according to their needs and watch your plant wall flourish.
6. Build a Custom Headboard for Your Bed

Why Build Your Own Headboard?
A headboard can be the focal point of your bedroom, and building one yourself gives you the freedom to create something unique and personalized. Whether you choose wood, fabric, or even repurpose old doors, a DIY headboard is an affordable and rewarding weekend project.
How to Make a Custom Headboard
Materials Needed:
- Plywood or MDF board
- Fabric or wood panels
- Foam padding (optional)
- Staple gun
- Screws and drill
- Saw (if needed)
Steps:
- Measure the Bed: Measure the width and height of your bed to determine the dimensions of your headboard.
- Cut the Base: Cut the plywood or MDF board to the size you need.
- Add Padding (Optional): If you want a soft headboard, cut foam padding to fit the board and attach it using a staple gun.
- Cover with Fabric or Wood: If using fabric, stretch it over the foam and staple it to the back of the board. For a wooden headboard, attach wood panels to the board.
- Attach the Headboard: Secure the headboard to the wall or attach it directly to the bed frame with screws.
7. Create a Framed Mirror

Why Choose a DIY Framed Mirror?
Framed mirrors add sophistication and style to any room. They reflect light, making a space feel brighter and larger. A custom-framed mirror can suit your personal taste and complement your home’s decor.
How to Make a Framed Mirror
Materials Needed:
- Mirror (pre-cut or custom)
- Wooden frame or molding
- Saw
- Glue or screws
- Measuring tape
Steps:
- Measure the Mirror: Measure the dimensions of your mirror to determine the size of the frame.
- Cut the Molding: If you’re using wood molding, cut it to the correct lengths for the frame.
- Assemble the Frame: Glue or screw the pieces of the frame together to create a rectangle or square around the mirror.
- Mount the Mirror: Attach the mirror to the frame using mirror clips or adhesive.
8. Make Your Own Decorative Throw Pillows

Why Custom Throw Pillows?
Throw pillows are an easy way to add comfort and style to your couch or bed. By making your own, you can choose the fabrics, patterns, and sizes that perfectly match your space.
How to Make Decorative Throw Pillows
Materials Needed:
- Fabric (choose your preferred material)
- Pillow inserts
- Needle and thread or sewing machine
- Scissors
Steps:
- Cut the Fabric: Cut two squares or rectangles of fabric to the size you want for your pillow.
- Sew the Pillow Cover: Place the fabric pieces together, right sides facing each other, and sew around the edges, leaving a small opening.
- Turn Inside Out: Turn the pillow cover right side out and insert the pillow insert.
- Close the Opening: Hand-stitch the opening closed and fluff your new pillow!
9. Create a DIY Rug with Rope or Fabric

Why Make a Custom Rug?
A DIY rug is a creative way to add color and texture to any room. You can make a rug from various materials, such as old fabric, rope, or even yarn. This is a great project for those who want a personalized and eco-friendly option.
How to Make a DIY Rug
Materials Needed:
- Rope or fabric strips
- Hot glue gun or sewing supplies
- Rug backing (optional)
Steps:
- Prepare the Materials: Cut your fabric into strips or gather your rope.
- Weave or Coil the Material: Start by either weaving the fabric or coiling the rope into a circle or rectangular shape.
- Attach the Strips or Rope: Use a hot glue gun or sew the pieces together to form a rug.
- Add a Backing: If desired, add a non-slip rug backing to keep it in place.
10. Paint an Accent Ceiling

Why Paint an Accent Ceiling?
While most people focus on walls when decorating, an accent ceiling can add a surprising touch of creativity and elegance to a room. Whether you choose bold colors, metallic finishes, or geometric patterns, painting an accent ceiling is a statement-making weekend project.
How to Paint an Accent Ceiling
Materials Needed:
- Paint
- Painter’s tape
- Drop cloths
- Paint roller and brush
Steps:
- Prep the Ceiling: Lay down drop cloths to protect your furniture and floors. Tape the edges of the walls to prevent getting paint on them.
- Choose Your Color: Pick a color that contrasts with your walls but complements the overall room decor.
- Paint the Ceiling: Apply paint to the ceiling using a roller, starting from the edges and working toward the center.
- Allow to Dry: Let the paint dry completely before removing the tape and moving furniture back.
FAQs Related to DIY Home Decor Projects
What is the easiest DIY home decor project to start with?
The easiest DIY home decor project to start with is creating decorative throw pillows. You only need some fabric, pillow inserts, and basic sewing skills to create a personalized touch for your space. You can also make small adjustments to match your room’s color scheme, which makes it a great beginner project.
How much does it cost to do a DIY home decor project?
The cost of a DIY home decor project can vary depending on the materials you choose. For example, repainting old furniture might cost $30-$50 for paint and supplies, while creating a macramé wall hanging can range from $20 to $40 for the rope and tools. Overall, DIY projects are often more affordable than purchasing pre-made decor, especially if you already have some supplies on hand.
Can I install peel-and-stick wallpaper by myself?
Yes, installing peel-and-stick wallpaper is one of the easiest DIY projects you can do yourself. The adhesive backing makes it easy to apply without the need for paste or glue, and most designs come with clear instructions. Make sure the wall surface is clean, and use a level to ensure straight application for the best results.
What are the best plants for a DIY plant wall?
For a DIY plant wall, choose plants that thrive in indoor environments with varying light conditions. Some of the best options include pothos, ivy, succulents, ferns, and snake plants. Make sure the plants you select have similar water and light requirements to ensure they grow well together.
How long does it take to complete a DIY home decor project over the weekend?
The time it takes to complete a DIY home decor project depends on the complexity of the task. Simple projects like creating throw pillows or installing floating shelves can be done in a few hours, while larger projects like building a headboard or creating a macramé wall hanging might take a full day or two. Plan ahead and break down the steps to manage your time effectively.
Do I need any special tools for DIY home decor projects?
For many DIY home decor projects, you don’t need specialized tools. Basic tools like a drill, measuring tape, paintbrushes, scissors, and a hot glue gun are often all you need. However, for certain projects, like building a headboard or framing a mirror, you may need a saw, a staple gun, or a level. Always check the requirements for the specific project you choose.
Are DIY home decor projects suitable for renters?
Yes, many DIY home decor projects are renter-friendly, such as peel-and-stick wallpaper, hanging floating shelves, or creating a plant wall. These projects can be done without making permanent changes to the property and can be easily removed when you move out, making them perfect for renters who want to personalize their space.
Conclusion
DIY home decor projects are a wonderful way to refresh your living space without breaking the bank. From painting furniture to creating custom wall art and making statement headboards, these weekend projects are both fun and rewarding. By investing a little time and creativity, you can transform your home into a stylish, personalized haven that reflects your unique taste and personality. Happy decorating!

